Kentico: How to add and edit fields in a form

How to Kentico
26. 05. 2026
Lukáš Šorf

*The guide is created for Kentico webforms. In newer versions, the settings for some features may differ. Not sure which version of Kentico you are using? Our helpdesk can assist you.


You can edit web forms to a limited extent yourself. See how to do it.
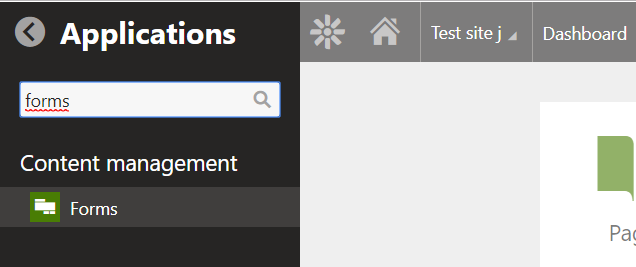
To access the form management in Kentico, click on the gear icon in the top left and search for the "Forms" module.

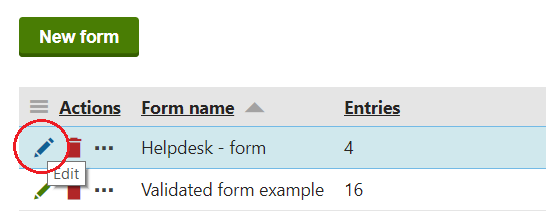
Furthermore, by clicking on the green pencil icon next to a specific form, you will access its edits.


Creating a New Field

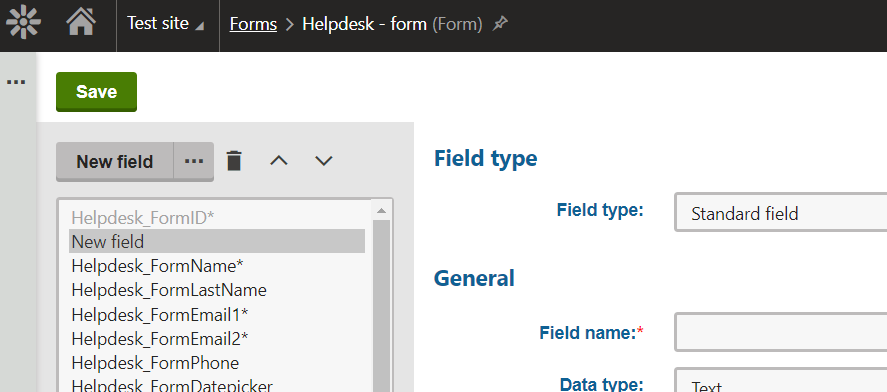
1. By clicking on the "Fields" tab and selecting "New field," we will start creating a new field.


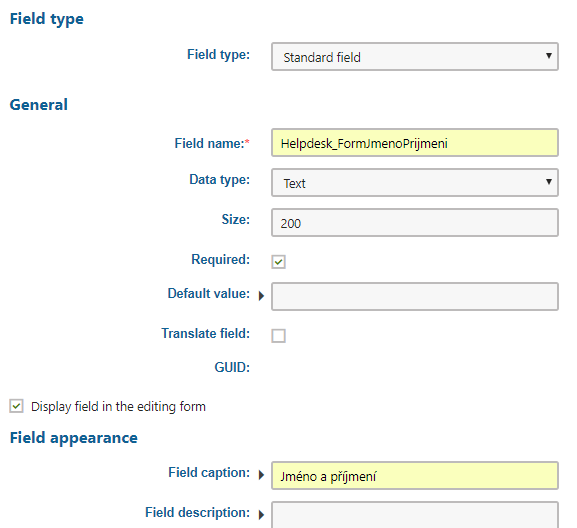
2. Field name → Internal field name. Choose a field name that does not contain diacritics, spaces, and at the same time, allows you to identify which form this field belongs to.

For example: Helpdesk_FormFirstNameLastName

Data type→ Select the type of input data, typically "Text" is chosen for a standard field that allows text input.

Size → Size of the field / number of characters that can fit in the field.

Required → Whether the field should be mandatory

Field caption→ Name of the field in the form on the website


If the field is mandatory, it is advisable to fill in "Default error message" → The message that will be displayed if the field is left empty.


The settings for your new field may look as follows:


By clicking the green button "Save" in the top left, you will save the creation of a new field.


3. On the left in the form settings navigation, select the "Layout" tab.


On the next page, you will see the layout of the form that is displayed to visitors on the website. Click in the text box below where your new field should appear.

Generally, each row here in the layout corresponds to a row with a field on the website. If you want two fields side by side in your form, it depends on how your form is styled. In this case, feel free to contact us for advice.


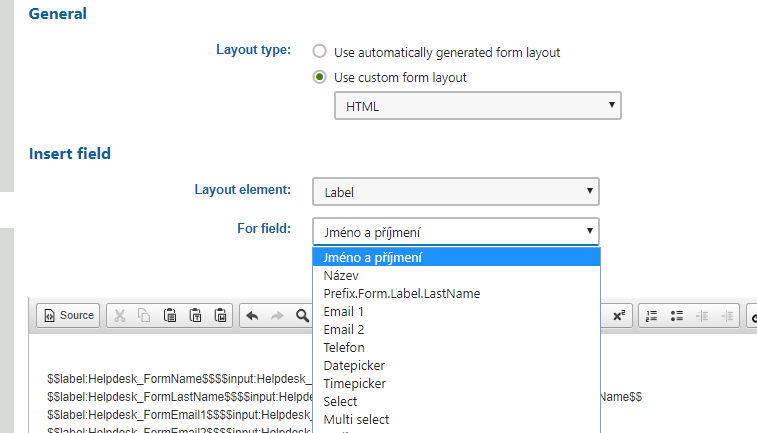
Typically, each field should have a "label", "input", and "validation". The process for adding your new field to the Layout:

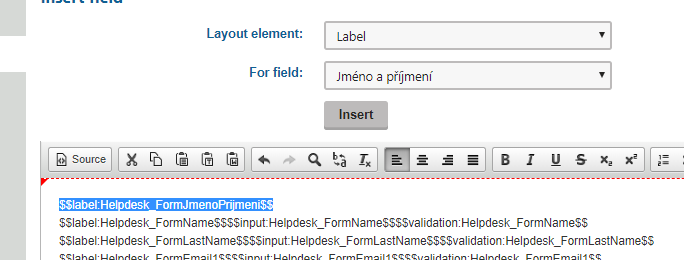
- Click on the selection in the "Layout element" field and choose "Label"

- In "For field", select your newly created field by name:


- Click on "insert"


The label with the new field will be added to the field in the form of:

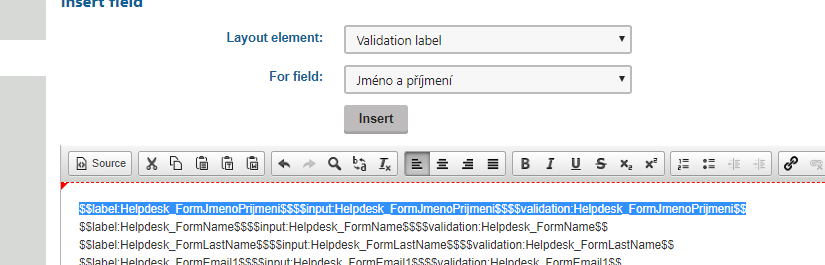
Also add "input" and "validation" from the "Layout element" field to the label.


It will all look as follows:

Save the layout by clicking on "Save" in the top left.


4. Check the display of your new field in the form on the website. The result may look as follows:

Done.


5. Adding a field to the notification email (Email notification in CMS Kentico)


Data from the fields in your form are typically transferred to Kentico → Forms → the specific form → Recorded Data

If you want the new field to also be included in the notification email from the form, you need to adjust its layout.


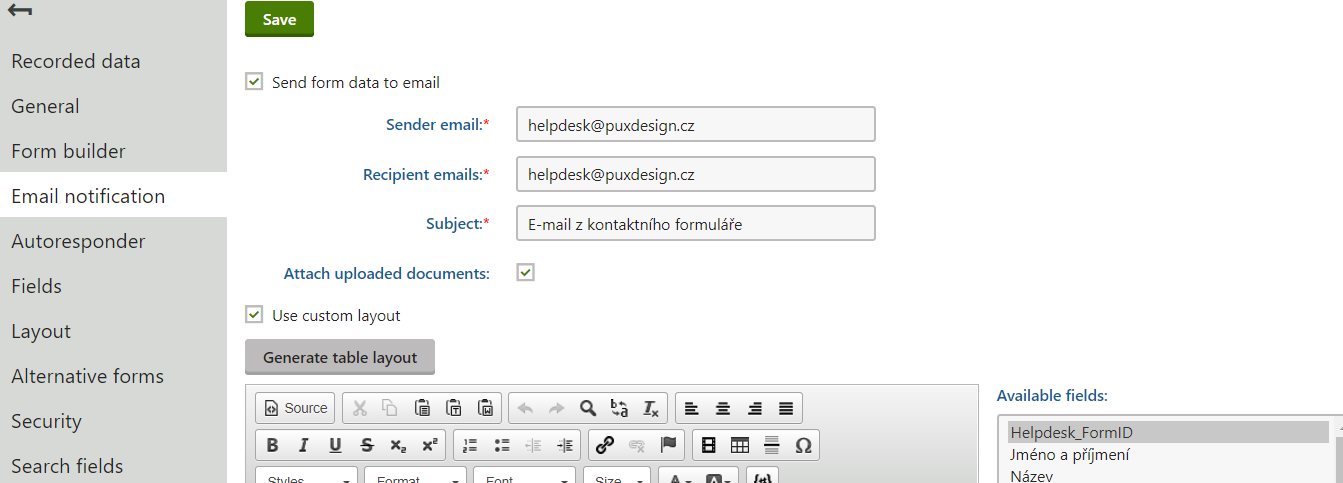
In the Kentico administration for the specific form, select the "Email notification" tab, and you should see a similarly looking page:

- At the bottom of the page, you will see a WYSIWYG text field and available fields for the form on the right, in English "Available fields".

- Click in the text field where you want to add your newly created field and the value entered from the form.

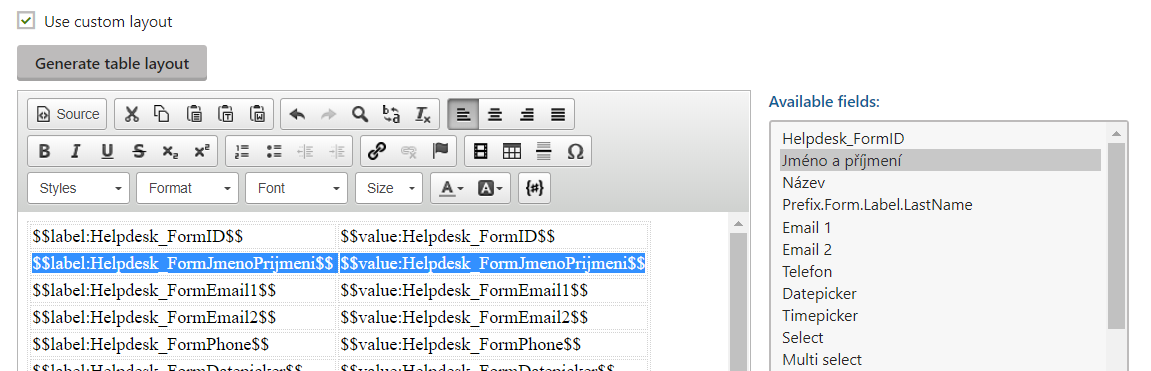
- On the right in the field selection, choose the new desired field and click on "Insert label" to insert the name of the respective field layout with the notification email.

- Then click on "Insert value" to insert the value of the respective field.


After modifications, the layout of the notification email may look as follows:

In the notification email, the label will be replaced with the field name, and the value will always be the value filled in by the website visitor in the form.


Save layout changes by clicking on "Save" in the top left.


6. Perform a test. Fill out the form and check your email where you receive notification emails from the website form.


Done.